|
|
|
| ROCKS' ARTICLES | ||||||||||||
| Planes, People, and Events from Hampton, Newport News, and York County Virginia | ||||||||||||
|
||||||||||||
|
I thought I would share a few words about a great flying airplane with my fellow modelers. I have been disappointed before with other kit reviews in that it seems the guy writing the review is a sponsor of the particular company. This could be the result of wanting to get published in one of the major magazines or perhaps the editors themselves bowing to advertising pressure. Rest assured I have no benefits to gain or lose in writing this review other than the satisfaction of perhaps passing along some of the knowledge that has been given to me by other modelers over the years. What follows is an objective review of this model. |
|
|||||||||||
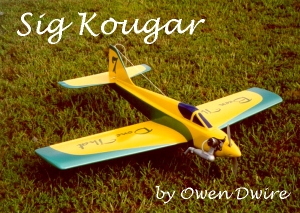
I selected the Kougar as my latest project because I wanted an airplane that could move along at a good clip, be aerobatic and at the same time be capable of handling crosswinds while being able to slow down so as to land at a reasonable speed. The Kougar seemed to fit my needs to a "T". It has a low aspect ratio wing with built in wash-out and a relatively thick cross section which allows it to slow down for soft as a feather touch-downs. The Kit The Kougar has a relatively small parts count. The foam cores for the wing come pre-cut and are packaged in their shells. The fuselage is basically a box utilizing solid balsa sheet sides with a plastic aft turtle deck to give it some shape. The tail feathers are simple �" thick slabs of balsa. There are no full size plans included with the kit, just an instruction booklet that is fairly complete and quite well done with pictures augmenting the written instructions. There is a pull out section that you have to cut and paste together for constructing the fuselage along with full size patterns for the firewall, etc. One thing that is a little different with this kit is that the balsa parts are all printed on the wood (no die cutting) requiring the builder to cut the parts out. Fortunately there are not all that many parts that have to be cut out. I liked having the former locations printed on the fuselage sides. One thing I did not like with this method was the way the stab was laid out on the balsa sheet. Instead of having the trailing edge of the stab parallel to (or even better, aligned with) the edge of the sheet, it was placed at an angle. Since I did not like the prospect of cutting the stab out with the T.E. at an angle to the prevailing wood grain I simply redrew it on the sheet. This caused me to have to manufacture some other parts from scraps of balsawood. Building Wings -- The Kougar went together very quickly. The wing has foam cores with 1/16" balsa wing skins. I had to glue together the balsa wing skins from pieces of 3" wide stock. My method of manufacturing wing skins differs somewhat from what I have read in magazines. After truing the edges of the 1/16" sheets, I like to use Ambroid ™ cement to edge glue the sheets together. I have found that using CA makes the wood surrounding the seam very hard and it is difficult to sand the entire wing skin flat. I then use a 12" long sanding block with the skins placed on a flat surface to ensure the large sheet is nice and flat. Other than very minor sanding later this is the last sanding I will do on the skins prior to attaching the glass cloth. This method insures a ripple-free wing. The wing cores are cut so as to have a small amount of washout at the tips. I always use the shells as a guide/form for attaching the skins so I do not unintentionally build any twist or warp into the wings. To attach the skins to the cores, I used double-sided tape specifically made for this purpose. I have used this product on other foam wings and really like it. There is no mess and the whole process takes very little time. It is important to ensure the cores and skins are smooth and dust-free when using the wing tape. I have never had any wing skins that I have attached with this tape separate from the foam cores. One of the modifications I made to the wing was to redo the strip ailerons. The original design had the strip ailerons extending all the way to the wing tips. To reduce the wing tip vortices and reduce the possibility of flutter, I elected to make the ailerons 2" shorter at the outboard of the wing. I attached scrap balsa material to the outboard trailing edge and shaped it to match the aileron profile. To compensate for the reduced control surface area I made the ailerons 1/8" wider. The decision to do this mod was made easier as the strip ailerons in the kit were warped and would have had to be replaced anyways. I also modified the wing by inlaying pieces of 1/16" plywood where the wing bolts pass through the wing. The instructions showed the plywood simply glued to the underside of the wing. This is an acceptable procedure but leaves a small ridge that I did not want. Fuselage -- The fuselage went together very quickly. I did substitute some softer (lighter) balsa for the fairing blocks at the tail and the nose section. I also 'painted' the fuel tank compartment and firewall with epoxy (thinned with alcohol). The cowl is made up from some sort of thick plastic. It was easy to work with and cutting the hole for engine and muffler went fairly quickly with my trusty Dremel ™ tool. I always like to attach cowlings with little pieces of fuel tubing placed over the screws to act as shock/vibration absorbers. This technique requires drilling the holes (in the cowl) large enough so the screw/fuel line is a snug fit. When the screw is tightened it will compress the fuel line to form a little grommet that holds the cowl securely to the fuselage. This technique prevents the cowling from stress cracking around the screw holes. Controls -- Setting up the controls on the Kougar was relatively straightforward. Some of the hardware in the kit was not what I would consider acceptable. I elected not to use the hinges, control horns, and pushrod materials. I did use the engine mounts, landing gear wires, and strip aileron control horn wires. The kit did not include a fuel tank, spinner, or wheels. None of this is what I would deem critical and would certainly not prevent me from purchasing the kit. The aileron servo is nestled in a hole cut in the wing center section and the three remaining servos easily fit in the fuselage. Being a fan of pull-pull control cables, especially on rudders, I elected not to use the suggested wood dowel/wire end pushrod for the rudder. The instructions call for making several bends in the wire ends to allow the pushrod to exit the fuselage and align with the rudder control horn. It has been my experience that pushrods manufactured like this result in very mushy control surface movement especially on large rudders. My favorite material for pull-pull control cables is the Kevlar string put out by Sullivan. This string has 100lb test strength and works great. I have found it will stretch slightly during the first couple of flights but after tightening it up with a turn or two at the clevis it remains very stable. I placed the 3 servos in the fuselage as far forward as I could with the airborne battery pack under the fuel tank. (Note: I had previously hollowed out the balsa block that fits under the nose section to accommodate the battery pack and its protective foam.) Since I wanted to be able to remove the fuel tank at a later date if necessary, I made my servo tray removable. This I did by gluing hardwood rails to the fuselage sides and attaching the servo tray with 4 servo screws. 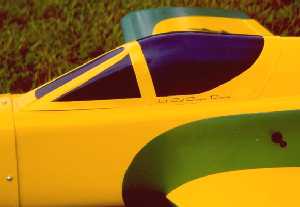
Finishing While the aircraft itself did not take long to put together, I did spend considerable time on the finishing process. I did not keep precise track of the time I spent, but I would venture to say that I easily spent more time on finishing the model than I did building it. The entire model was covered with 5/8 ounce glass cloth. Working with cloth this light can be difficult. To make it easier to handle, lightly spray it with spray adhesive. This will hold the weave together (prevent fraying) when cutting it to size and during the subsequent handling required. I used thinned Sig Nitrate clear dope to adhere the cloth to the model. To fill the weave in the cloth I used Nitrate dope mixed with talcum powder. While this method is quick and easy, you do have to have a properly ventilated area to work in. The fumes from the dope and the small particles from sanding the talcum powder filler present a definite health concern. For me, all this equated to doing this part of the project outside and wearing a dust mask while sanding. I needed to use two coats of dope and talcum powder (each followed by plenty of sanding) to fill the weave. After I had the weave filled I sprayed on a light coat of primer. This too, has to be almost completely sanded off. I painted the model using Super Poxy two part paints put through my trusty spray gun. The yellow required two coats and the metallic green, one. Prior to masking the model and spraying the green, I let the yellow dry for a week. I like to use black electrician's tape to mask with. It is important to remove the masking about 15 to 30 minutes after spraying. The tape will come off easier without causing the trim color to chip and will also allow the edges to settle so you don't have a nasty paint ridge. The lettering on the wings and fuselage was made on my computer and printed on decal paper designed for laser printers. This was my first attempt at making my own decals and I learned a lot through trial and error. I also wasted about $15 worth of decal paper! Oh well, at least I know how to do it now. Flying I found the Kougar to be very enjoyable to fly. The OS .45 FSR turning a 10x7 prop up front provided plenty of power. I used the control settings recommended in the instructions for the initial flights. In addition, I added � oz of weight to the nose to balance the aircraft at the front of the CG range. I tend to be a little conservative on the first flight of a new model. Especially on one where I have spent considerable effort and time in finishing. Thus the first flight of the Kougar was to basically see if it would fly. The aircraft will slow down considerably and when it does stall, it does so straight ahead without dropping a wing. Following the first flight of any new model I always do a very thorough post flight inspection before taking it back up. This cautious pace also allows me to calm my nerves, which tend to get a little tight with a new aircraft. On subsequent flights, I expanded the flight envelope and worked on trimming the aircraft. I removed the nose weight, added to the elevator travel, and reduced the aileron travel slightly. The aircraft is fairly easy to fly and is very capable of flying any maneuver I have the ability to command. The only nasty habit I have noted is roll-coupling when using the rudder. When making a knife-edge pass, quite a bit of opposite aileron is required to maintain the aircraft in the proper attitude. Landing this aircraft is a piece-of-cake. 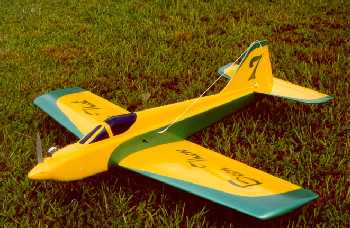
Flying I found the Sig Kougar to be a joy to build and fly. I can strongly recommend this airplane to my fellow modelers. If there is some aspect of this aircraft (or my techniques) you have a question on, just drop a note on Rock's web page and I will get back to you. See you at the field, Owen |
||||||||||||
|
|||||||||||||
|
|||||||||||||
| This page is best viewed at 800 x 600 resolution and 24bit color with font viewing set at medium on MS IE 5 | |||||||||||||
| Please email comments, questions, or concerns to Wjmillerjr@aol.com All rights reserved. | |||||||||||||